
Barcode Professional CRI for Reporting Services lets you to accomplish this task by setting up the FitBarsAreaToSize property in the Visual Studio's Properties Window (figure 1) or through out the Barcode Builder form under Font & Format tab in the Image Settings section (figure 2).
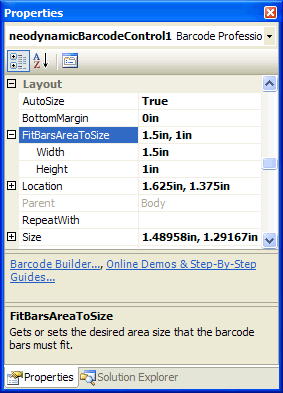
Figure 1: FitBarsAreaToSize property
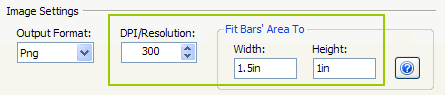
Figure 2: The Width and Height of the target area in Barcode Builder
NOTE
When you set up the FitBarsAreaToSize property it will take precedence over any change you make on other dimension properties such us BarWidth, BarHeight, etc. You must set up the FitBarsAreaToSize property to an empty value in order to disable the "fit to size" feature.
When you set up the FitBarsAreaToSize property it will take precedence over any change you make on other dimension properties such us BarWidth, BarHeight, etc. You must set up the FitBarsAreaToSize property to an empty value in order to disable the "fit to size" feature.
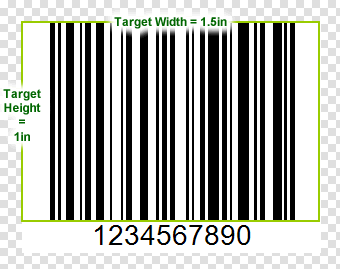
When you set up this target area values, Barcode Professional will automatically calculate the new dimensions for the barcode in order it fits the desired size. Keep in mind the following points about the target area:
- The target Width includes the whole barcode bars width plus left and right Quiet Zones (QuietZoneWidth property)
- The target Height includes the barcode bar's height only
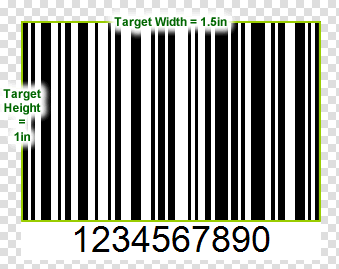
If you want to fulfill the whole target area with the barcode only, then you should just set up the QuietZoneWidth property to zero (in order to rid of the left and right margins) as is shown in the following figure.
Finally, keep in mind too that in some cases of high precision barcode generation, increasing the DPI property may be required.