Barcode CRI Configuration
Important
- You can use the Barcode CRI (Custom Report Item) ONLY if you are targeting the following editions of Reporting Services: Standard, Enterprise, Business, or Datacenter. If you are targeting Express, Workgroup, or Web editions, then use Barcode DLL approach instead
- If you ONLY want to use Barcode Professional with Visual Studio ReportViewer Controls i.e. using reports in LOCAL MODE (Client-side processing RDLC), the configuration steps described below ARE NOT NECESSARY
In order the Barcode CRI (Custom Report Item) component can be used in Visual Studio (or BIDS or SSDT) and Reporting Services, it must be configured in some *.config files as well as copied to some specific folders.
The configuration process can be accomplished in two different ways: Wizard-assisted or Manually
Wizard-assisted Configuration
The Neodynamic Barcode Configuration Tool can be launched from Start > All Programs > Neodynamic > Barcode Professional for Reporting Services > Configuration Tool and the physical file of this tool should be located in [BarcodeInstallDir]\Tools\NeodynamicBarcodeConfigTool.exe
Note
Neodynamic Barcode Configuration Tool requires .NET Framework 2.0+ with its latest service pack
Important
- We highly recommend you backup the Reporting Services configuration files affected before continuing the configuration process.
- The Configuration Tool must not be executed in Production Report Servers! Please refer to the Barcode CRI Deployment topic instead.
After launching the Neodynamic Barcode Configuration Tool, the first step is to specify what action you want to accomplish i.e. start the configuration process or remove a current configuration. Just click on the appropriate button on the screen and follow up the instructions.
To add the Barcode CRI to the Visual Studio toolbox, then refer to Visual Studio Toolbox configuration
Manual Configuration
1. Visual Studio (or SSDT or BIDS) Configuration
Please look at your Visual Studio (VS) install folder and subfolders for this file: Micorosoft.ReportingServices.Designer.dll. Then select properties in Windows Explorer and grab the Version number of such dll.
After you got the version number of Microsoft.ReportingServices.Designer.dll, do the following:
Copy the Barcode Professional CRI Assembly located by default in [BarcodeInstallDir]\Bin\BarcodeCRI\RSDSGnn (where nn is the major version number that matches to Microsoft.ReportingServices.Designer.dll) to the same folder where Microsoft.ReportingServices.Designer.dll is located.
Add Barcode Professional in VS's RSPreviewPolicy.config file. This file should be in the same folder as before. Open this file using NotePad or any other Text Editor and change it as it's stated in the config files we've included in our installation folder [BarcodeInstallDir]\Config Files Sample...\RSPreviewPolicy.config looking for the following entry:
<CodeGroup class="UnionCodeGroup" version="1"
PermissionSetName="FullTrust" Name="NeodynamicBarcodeControl"
Description="This code group grants FullTrust to Neodynamic Barcode
Professional for Reporting Services assembly.">
  <IMembershipCondition class="StrongNameMembershipCondition"
version="1" PublicKeyBlob="0024000004800000940000000602000000240000525341310004000001000100AB4EE885870B9FFB1AA61F0D42494FBD581B32D8B332B314698D557F603FBCC3733E8F727FDF9F1ADEBD9AF1DA0A50E7FCF6C60725AA8BFCA478A0E7FBF1D791712594E2375CB07A0BE0F24D31829F9830D7FDC72EEA3CD5A0E39C22E347E3B1CABDE32ABA9CAF81CCF938FD730C451B86BD8DC6250078DFD88838DF4D9C73A7"
/>
</CodeGroup>
Add Barcode Professional in VS's RSReportDesigner.config file. This file should be in the same folder as before. Open this file using NotePad or any other Text Editor and change it as it's stated in the config files we've included in our installation folder [BarcodeInstallDir]\Config Files Sample...\RSReportDesigner.config looking for the following entries:
<ReportItemDesigner>
  <ReportItem Name="NeodynamicBarcodeControl" Type="Neodynamic.ReportingServices.BarcodeDesigner, Neodynamic.ReportingServices.Barcode" />
</ReportItemDesigner>
<ReportItems>
  <ReportItem Name="NeodynamicBarcodeControl" Type="Neodynamic.ReportingServices.BarcodeReportItem, Neodynamic.ReportingServices.Barcode" />
</ReportItems>
To add the Barcode CRI to the Visual Studio toolbox, then refer to Visual Studio Toolbox configuration
2. Reporting Services Configuration
Note
If you DO NOT HAVE Reporting Services (Report Server) installed locally in the machine where you develop & design your RDL reports, then the configuration steps described below ARE NOT NECESSARY.
Please follow up all the steps stated in the Barcode CRI Deployment topic.
Visual Studio Toolbox configuration
Important
- YOU WILL ABLE TO USE THE BARCODE CRI (Custom Report Item) WITH DESIGN-TIME FEATURES IF AND ONLY IF THE SQL SERVER THAT WILL BE RUNNING THE REPORT SERVER IS STANDARD, ENTERPRISE, BUSINESS OR DATACENTER EDITIONS ONLY! OTHERS SQL SERVER EDITIONS SUCH AS EXPRESS, WORKGROUP OR WEB; LACK OF SUPPORT FOR THIRD PARTY CRI.
- Be sure you correctly Configured Barcode CRI as stated in the above topics
Please follow up these steps:
- Launch Visual Studio or SQL Server Business Intelligence Development Studio or SQL Server Data Tools
- Create a new Report Server Project or open an existing one.
- Open the Toolbox, right-click on it, and select Choose Items
- Click on Browse button, and navigate to the following folder:
- for VS2015/VS2013/VS2012/VS2010/VS2008/VS2005, go to [VS Install Folder]\Common7\IDE\PrivateAssemblies
- for VS2017+, go to [VS2017+ Install Folder]\Common7\IDE\CommonExtensions\Microsoft\SSRS
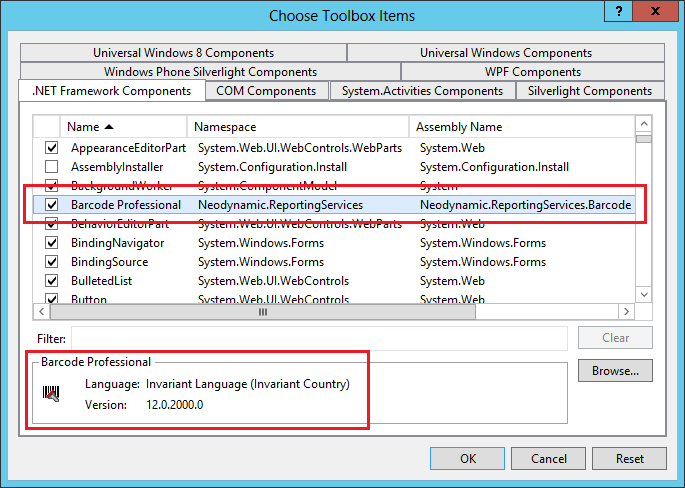
- Select Neodynamic.ReportingServices.Barcode.dll from that dialog, and click on Open.
- Click on OK button.
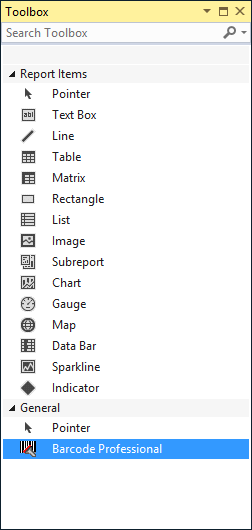
- In the .NET Framework Components list, check Barcode Professional, then click OK
- The Barcode CRI control should now appear in the Visual Studio Toolbox so you can drag & drop it on your reports