
First Steps with Barcode Professional for Windows Forms
Barcode Professional for Windows Forms can be used in Visual Studio IDE for adding high quality barcode generation and printing support to your .NET Application. Basically, when you need barcode features in an application, you must to know what Barcode Symbology you need to generate as well as what data will be encoded into the barcode. Both information needs to be specified to Barcode Professional through the Symbology and Code properties respectively.
A simple barcode application sample
Suppose you need to encode a Code 128 barcode based on the data entered by a user into a TextBox. Follows these steps:
- Open Visual Studio (2005/2008/2010 or Express Editions) and create a new Windows Forms project using your preferred .NET language VB or C#.
- Drag a TextBox, a Button and a BarcodeProfessional control from VS toolbox onto the Form.
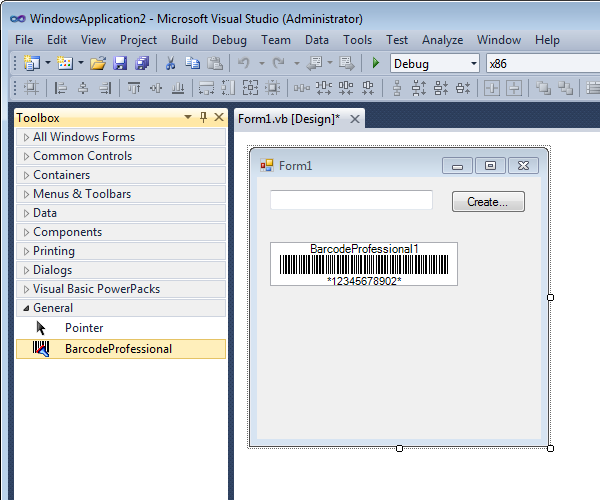
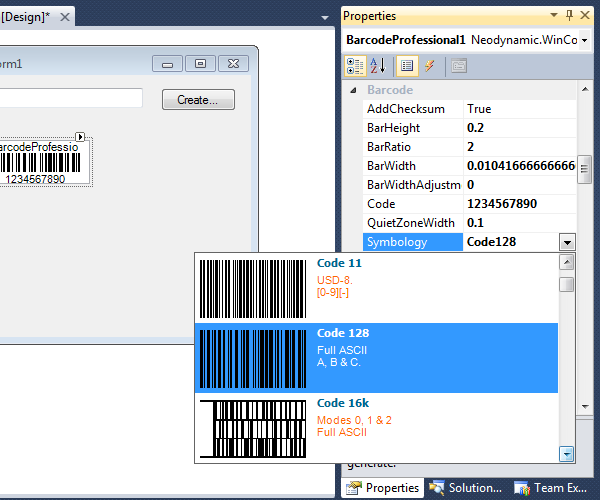
- Setting up the Barcode Symbology. Select the barcode control onto the Form and then look for Symbology property. Pick the Code128 barcode from the list.
- Specifying the value to encode. Double click on the Button control and add this code inside Click event.
VB.NET
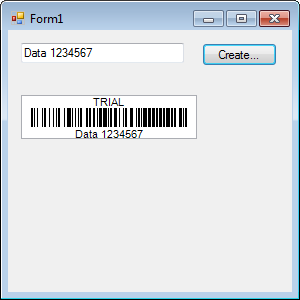
Me.BarcodeProfessional1.Code = Me.TextBox1.Text
C#
this.BarcodeProfessional1.Code = this.TextBox1.Text;
- That's it. Just hit F5 to run your app. Then enter any text and clicking on the button, the barcode will be generated for such specified data.
Online Samples
We've developed many samples using Barcode Professional for Windows Forms in order to help you getting started.
Below is the list of online up to date Step-By-Step Guides. If for any reason you can't see them, please enter at http://www.neodynamic.com/Products/Demos/Demos.aspx?tabid=74&prodid=3
Below is the list of online up to date Step-By-Step Guides. If for any reason you can't see them, please enter at http://www.neodynamic.com/Products/Demos/Demos.aspx?tabid=74&prodid=3
 Visit Neodynamic's website.