Barcode Data Binding in Windows Forms with Binding Navigator - Visual Studio 2005
Product Barcode Professional for Windows Forms Published 02/24/2006 Updated 02/24/2006
Requirements
Neodynamic Barcode Professional 2.5 for Windows Forms
Microsoft .NET Framework 2.0 or greater
Microsoft Visual Studio 2005
Microsoft Visual Studio 2005 Express Editions (VB, C#, J#, and C++)
In the following step by step guide we're going to create a simple Windows Forms application that accomplishes data binding tasks. In this Windows Forms we'll use Barcode Professional to bind a data field to it and using Binding Navigator controls as well. We'll use Microsoft's AdventureWorks database sample for SQL Server 2005.
Follow these steps:
- Ensure you have installed Barcode Professional for Windows Forms
- Launch Visual Studio and create a new Windows Forms application
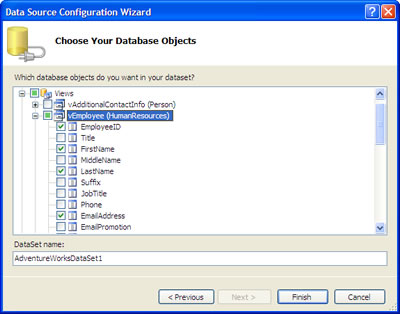
- Go to Data > Add New Data Source and follow the wizard's instructions. Select the AdventureWorks database. When you are asked for a Database object, select vEmployee (HumanResources) view and the fields shown in the following figure.
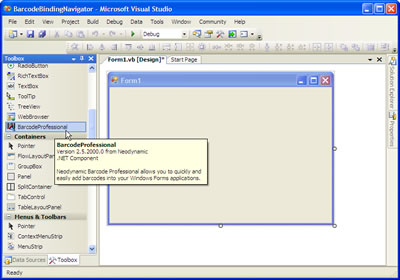
- Open the default Form at design-time and ensure that Barcode Professional is on the Visual Studio Toolbox as is shown in the following figure:
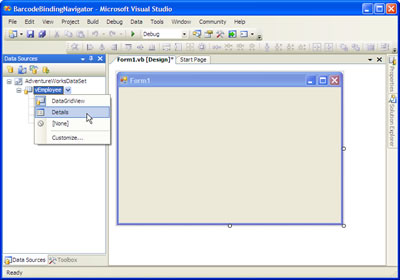
- Now, change to the Data Sources Explorer, select vEmployee and set its view to Details as is shown in the following figure.
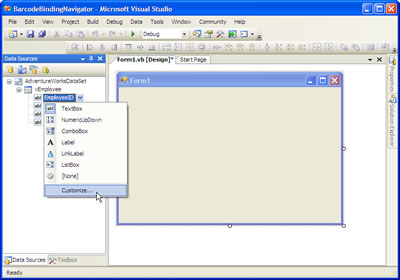
- We want to represent the EmployeeID field as a barcode image onto the form. In order to accomplish it, we should "bind" the EmployeeID field with Barcode Professional. Click on the button on the right of EmployeeID field and select Customize from the popup menu as is shown in the following figure.
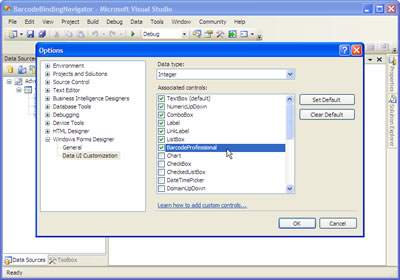
- In the Options dialog box, select BarcodeProfessional
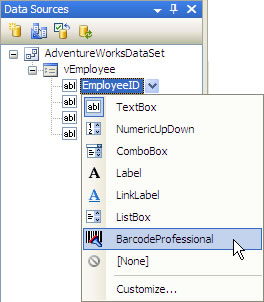
- After that, Barcode Professional is ready to be bound with EmployeeID field. Click on the button on the right of EmployeeID field and select BarcodeProfessional.
- Now it's time the designer automatically creates the form layout. Select the vEmployee item from the Data Sources Explorer and drag & drop it onto the form. Then, select the barcode control on the form and set an empty string to its Text property. The form should look like the following.
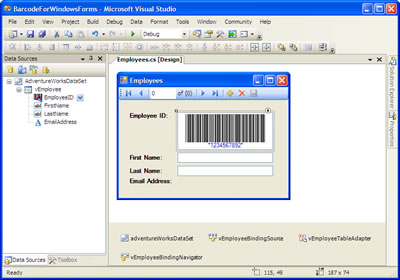
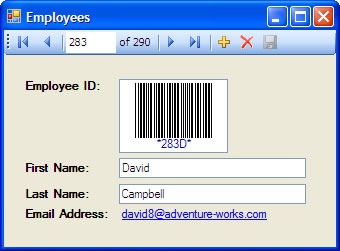
- That's it. Run the app. You'll get something like the following: