Using ASP.NET Data Binding feature with Barcode Professional
Product Barcode Professional for ASP.NET Published 02/24/2006 Updated 02/24/2006
Requirements
Neodynamic Barcode Professional 2.0 for ASP.NET (WebControl)
Microsoft .NET Framework (any version)
Microsoft Visual Studio .NET (any version)
There are situations in where you may need to render a series of barcode images in for example a data-bound control such as a DataList.
In the following sample we're going to create a simple ASP.NET WebForm that shows the Data Binding feature of ASP.NET with Barcode Professional.
We're going to examine two different scenarios but in both we're going to use a simple string array that holds a series of values to encode for simplicity.
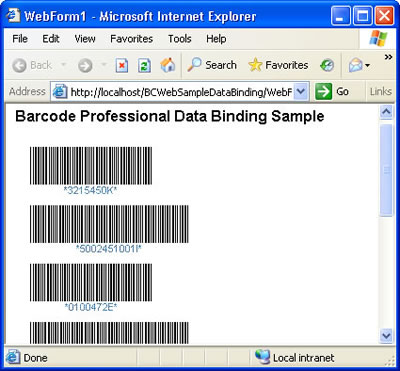
Simple and direct Data Binding
Follow up these steps
- Open your .NET development tool � such as Visual Studio .NET � and create a new ASP.NET Web Application.
- Drag and Drop a DataList control onto it. Right-click on the DataList and start the editing item template.
- Drag and Drop a Barcode Professional control into the ItemTemplate zone of the DataList control.
- Select the Barcode Professional control and in the property window click on DataBindings entry to open the DataBindings editor. In it, select the Code property and write the following in the Custom binding expression text box:
Container.DataItem
Click Ok button and end the editing template. - Now, in the code behind class write the following in the Page_Load event procedure:
VB
Dim barcodes As String() = {"3215450", "5002451001", "0100472", "6546501202", "0221545544", "0021015454", "966354478", "897220002"}
DataList1.DataSource = barcodes
DataList1.DataBind()
C#
Dim barcodes As String() = {"3215450", "5002451001", "0100472", "6546501202", "0221545544", "0021015454", "966354478", "897220002"}
DataList1.DataSource = barcodes
DataList1.DataBind()
That's it. Build the ASP.NET Web Application and run it.
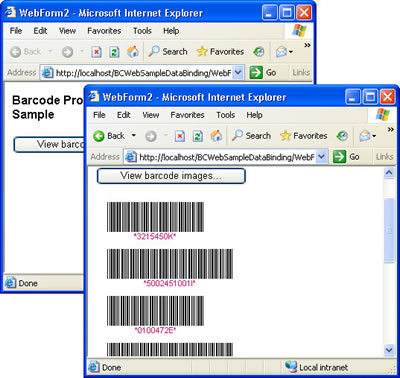
Simple Data Binding in a "Dynamic" way
In this case the data binding operation will be done when a Button control is clicked.
Follow up these steps
- Open your .NET development tool � such as Visual Studio .NET � and create a new ASP.NET Web Application.
- Drag and Drop a Button control and a DataList control onto it. Right-click on the DataList and start the editing item template.
- Drag and Drop a Barcode Professional control into the ItemTemplate zone of the DataList control.
- Select the Barcode Professional control and in the property window click on DataBindings entry to open the DataBindings editor. In it, select the Code property and write the following in the Custom binding expression text box:
Container.DataItem
Click Ok button and end the editing template. - Now, in the code behind class write the following in the Page_Load event procedure:
VB
'Call the ProcessBarcodeRequest method to serve requests
BarcodeProfessional.ProcessBarcodeRequest()
C#
//Call the ProcessBarcodeRequest method to serve requests BarcodeProfessional.ProcessBarcodeRequest(); - Finally, double-click on the button control and write the following code in the Button1_Click event procedure:
VB
Dim barcodes As String() = {"3215450", "5002451001", "0100472", "6546501202", "0221545544", "0021015454", "966354478", "897220002"}
DataList1.DataSource = barcodes
DataList1.DataBind()
C#
string[] barcodes = {"3215450", "5002451001", "0100472", "6546501202", "0221545544", "0021015454", "966354478", "897220002"};
DataList1.DataSource = barcodes;
DataList1.DataBind();
That's it. Build the ASP.NET Web Application and run it.