How to create barcode images with Microsoft Expression Web in ASP.NET Websites
Product Barcode Professional for ASP.NET Published 01/12/2007 Updated 01/12/2007
Overview
In the following Step-By-Step Guide we're going to create a simple ASP.NET Website featuring an ASP.NET web page with barcoding capabilities by using Barcode Professional for ASP.NET and Microsoft Expression Web.
Requirements
Neodynamic Barcode Professional 3.0 (or greater) for ASP.NET (WebControl)
Microsoft .NET Framework 2.0 (or greater)
Microsoft Expression Web
This sample demo will show you how to create a fictitious page to display Fabrikam Products which are stored in an XML file and by adding barcode images.
Follow these steps:
- Open Microsoft Expression Web and create a new Website naming it FabrikamProducts
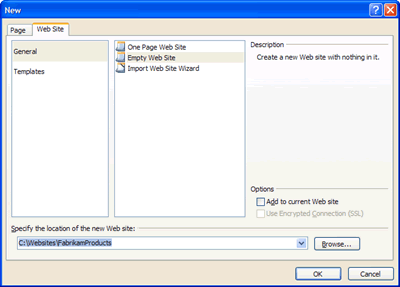
Creating a new website for Fabrikam Products
- Creating the XML file for Fabrikam Products. Go to File menu and click on New option. In the "New" dialog box select XML item from the list and click OK
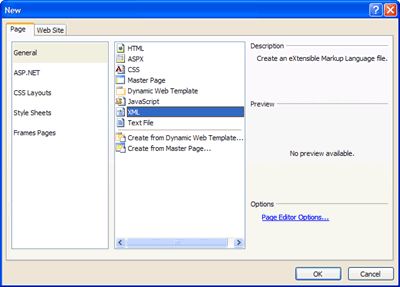
Adding a new XML file for Fabrikam Products
- Copy and paste on the created XML file the following content.
Save the XML file naming it Products.xml<?xml version="1.0" encoding="UTF-8"?> <Catalog> <Products> <Product name="VPR-1000 Protect Case" Description="High resistent polymers and aluminum extracts that will protect your widget for life. Fire, Snow, Water or Dust... This guy takes it all." price="$89.00" /> <Product name="Headphones" Description="Add some high quality audio to your video experience. With these comfortable headphones you'll feel like sound comes out of your brain." price="$19.90" /> <Product name="Antenna" Description="Get connected to local wireless networks and download streaming media directly to your VPR-1000" price="$38.45" /> <Product name="2TB Hard Drive" Description="If you are about to travel then you need extra storage space. With this 2TB drive you'll finally be able to take thousands of hours of entertainment with you." price="$75.90" /> <Product name="1GB Card" Description="Take more pictures and save them. Plug your card in your VPR-1000 or any other compatible device and browse through your pictures." price="$29.90" /> <Product name="Tripod" Description="Take your VPR-1000 and use it everywhere. Flat or curved, soft or hard surfaces, this tripod is ready to do the job." price="$12.35" /> <Product name="Data Port" Description="Expand you connectivity possibilities using this super fast data port. Sends and receives data at high speed using a powerful encoder." price="$25.79" /> <Product name="Bluetooth module" Description="Be part of this wide spread technology. Connect to any other widget or device using the BT module." price="$32.90" /> </Products> </Catalog> - Configuring Barcode Professional for using it in Microsoft Expression Web. In order to enable design-time support for Barcode Professional in Microsoft Expression Web (This step must be performed only once on your machine), the Neodynamic.WebControls.BarcodeProfessional.dll file must be registered to the GAC (Global Assembly Cache).
Registering Barcode Professional file to the GAC
Open two instances of Windows Explorer. In the first instance go to the folder where you installed Barcode Professional for ASP.NET and in the second instance go to the C:\Windows\assembly folder. After that, drag & drop the Neodynamic.WebControls.BarcodeProfessional.dll file from [InstallDir]\Redistributable\For NET 2.0 folder to the C:\Windows\assembly folder as is shown in the following figure.
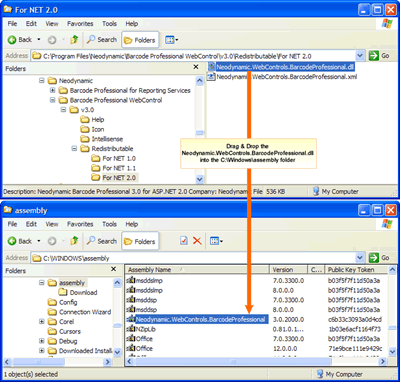
Registering Barcode Professional for ASP.NET to the GAC
- Add a new ASPX (ASP.NET Web Page) file to the project by going to File > New > ASPX. Save and name it Catalog.aspx
- In order to use Barcode Professional on an ASP.NET Page (ASPX file) you must write the following ASP.NET Register directive.
<%@ Register TagPrefix="neobarcode" Namespace="Neodynamic.WebControls.BarcodeProfessional" Assembly="Neodynamic.WebControls.BarcodeProfessional, Version=3.0.2000.0, Culture=neutral, PublicKeyToken=c6b33c3093a0d4cd" %>
Copy and paste it as is shown in the following figure.
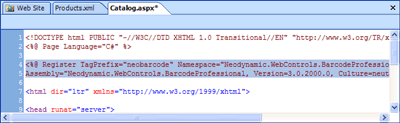
Adding the Register directive for Barcode Professional
- Drag & drop an XmlDataSource control from the Toolbox onto the page.
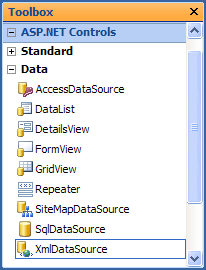
The XmlDataSource ASP.NET Control
- Select the XmlDataSource control on the page and click on "Configure Data Source" as is shown in the following figure.
In the "Configure Data Source" dialog box, write Products.xml in "Data file" and Catalog/Products/Product in "XPath expression" and click OK.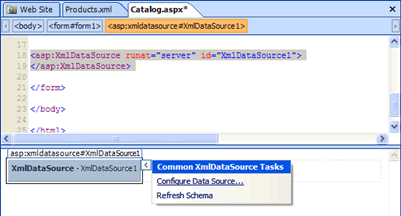
Configuring Data Source for XmlDataSource control
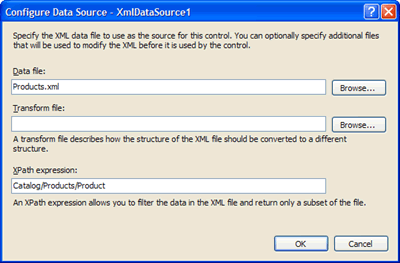
Specifying Products.xml file as Data Source
- Drag & drop a GridView control from the Toolbox onto the page.
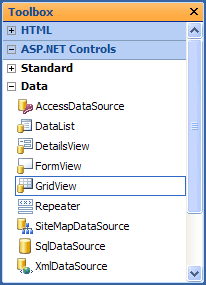
The GridView ASP.NET control
- Select the GridView control on the page and select XmlDataSource1 from "Choose Data Source" as is shown in the following figure.
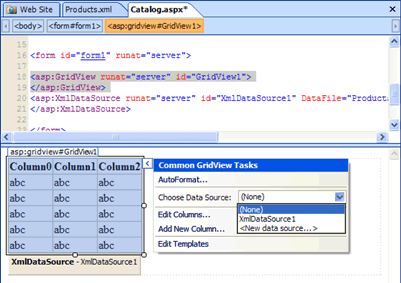
Specifying the Data Source for GridView control
- Right-click the GridView control, click "Show Common Control Tasks" and click "Edit Columns".
In the "Fields" dialog box, select TemplateField item in the Available fields list and then click Add as is shown in the following figure.
After that, the TemplateField will appear in the Selected fields list. Select and move it to the top as is shown in the following figure.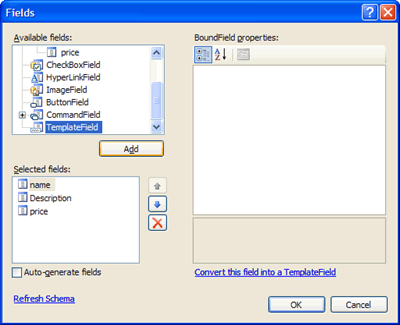
Adding a TemplateField column
Finally, change the HeaderText property of the TemplateItem to Barcode as is shown in the following figure.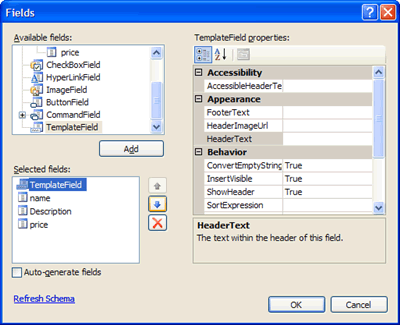
Making the TemplateField the first column of the GridView
Click OK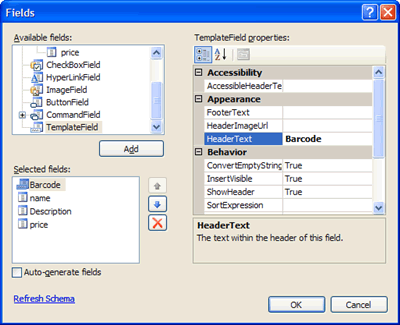
Setting up the HeaderText property of the TemplateField column
- In Code View, look for "<asp:templatefield HeaderText="Barcode">" line and add inside it the following code
NOTE: the following code add barcode control inside the TemplateField column. The barcode control will encode the product's name by using Code 128 Symbology Standard. Please keep in mind that Barcode Professional supports many more Barcode Symbology Standards which can be used in this sample as well. For more information about supported standards please visit Barcode Symbologies Center at https://www.neodynamic.com/barcodes/Symbologies.aspx<ItemTemplate>
<neobarcode:BarcodeProfessional ID="barcode1" runat="server" Symbology="Code128" Code='<%# Eval("name") %>' />
</ItemTemplate>
As is shown in the following figure
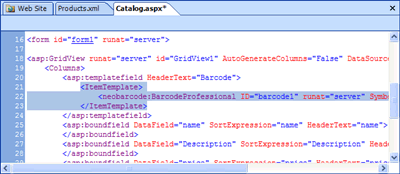
Adding barcode control inside the TemplateField column of GridView
- That's it. Hit F12 to preview the page in your default browser.

The Fabrikam Products List with barcodes at runtime