
Neodynamic Barcode Professional 3.0 for Reporting Services
Microsoft .NET Framework 1.1 or greater
Microsoft Visual Studio .NET 2003, Microsoft Visual Studio 2005 or SQL Server Business Intelligence Development Studio
Microsoft SQL Server 2000/2005 Reporting Services or Visual Studio Local Reports RDLC
It's very common to need to create a barcode image in order it fits a given area, for instance: "The barcode must fit an area of size 1.5 inch x 1 inch". Take a look the following scenarios to learn how to accomplish this kind of requirements.
So, supposing you want to create a barcode image that must fit an area of size 1.5 inch x 1 inch; in order to accomplish that you must:
Public Function GetBarcode(ByVal valueToEncode As String) As Byte()
	objBarcode.Code = valueToEncode
	objBarcode.Symbology = Neodynamic.ReportingServices.Symbology.Code128

	'Settings for fitting the barcode image to the desired area
	objBarcode.AutoSize = True
	objBarcode.Dpi = 300
	objBarcode.FitBarsAreaWidth = 1.5
	objBarcode.FitBarsAreaHeight = 1
	objBarcode.QuietZoneWidth = 0
	objBarcode.TopMargin = 0
	objBarcode.BottomMargin = 0
	objBarcode.Text = ""
	objBarcode.DisplayCode = False
	Return objBarcode.GetBarcodeImage()
End Function 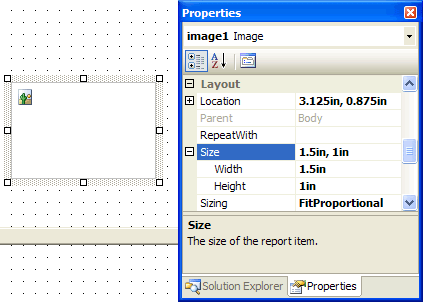
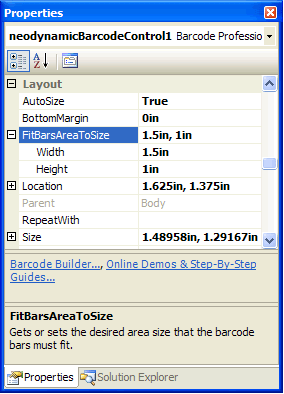
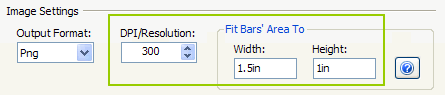
In this reporting scenario, the Barcode Professional Report Item is placed on the report surface where you want to display the barcode image. If Barcode Professional is used as a Report Item, then a few main properties must be specified. Given the previous hypothetical example, just set up the FitBarsAreaToSize property in the Visual Studio's Properties Window (figure 1) or through out the Barcode Builder form under Font & Format tab in the Image Settings section (figure 2).
When you set up this target area values, Barcode Professional will automatically calculate the new dimensions for the barcode in order it fits the desired size. Just keep in mind the following points about the target area:
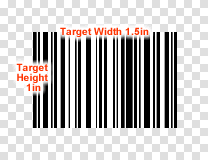
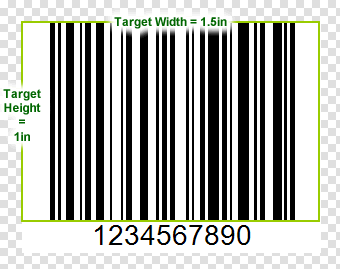
The mentioned points want to mean that, for example, if you want to encode the data 1234567890 in Code 128 at 300DPI in order it fits an area of size 1.5 inch x 1 inch and if you have set up a Quiet Zone Width of 0.1 inch, then you'll get the following barcode.
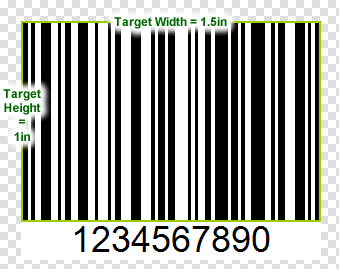
However, if you wanted to fulfill the whole target area with the barcode only, then you should just set up the QuietZoneWidth property to zero (in order to rid of the left and right margins) and after that setting, the following barcode will be generated.
Finally, keep in mind too that in some cases of high precision barcode generation, increasing the DPI property may be required.
We provide best-in-class customer service and support directly from members of our dev team! If we are available when you contact us, you will get a response in few minutes; otherwise the maximum turnaround is 24hs in most cases.