How to use Barcode in Reporting Services 2005 report's Code section - Product List Sample
Product Barcode Professional for Reporting Services Published 05/01/2007 Updated 05/01/2007
Overview
In the following walkthrough we'll create a Report Server Project which features barcode images by using Barcode Professional, Visual Studio 2005 or SQL Server Business Intelligence Development Studio, and Reporting Services 2005.
Requirements
Neodynamic Barcode Professional 3.0 for Reporting Services or greater
Microsoft .NET Framework 2.0 or greater
Microsoft Visual Studio 2005 or SQL Server Business Intelligence Development Studio
Microsoft SQL Server 2005 Express, Workgroup, Standard or Enterprise Edition
Microsoft SQL Server 2005 Reporting Services
In this sample we'll create a Product List RDL report by using Microsoft's AdventureWorks database sample.
Follow up these steps
- Open Visual Studio 2005 or SQL Server Business Intelligence Development Studio and create a new Report Server Project
- Add a new Data Source pointing to the AventureWorks database
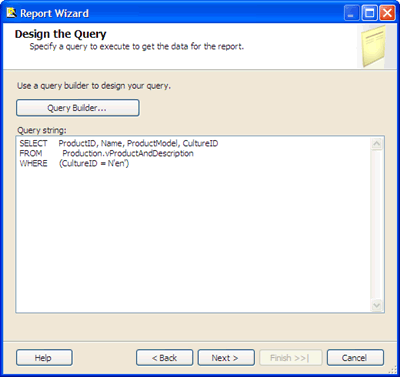
- Add a new Report item, name it to ProductList.rdlc, and enter the following SQL Statement:
SELECT ProductID, Name, ProductModel, CultureID FROM Production.vProductAndDescription WHERE (CultureID = N'en')
as is shown in the below figure.
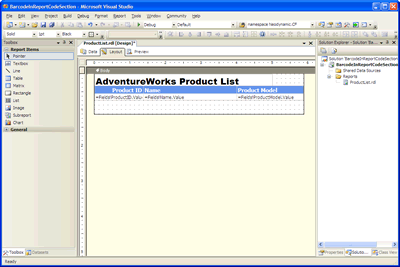
- Select a Tabular type report and add the fields ProductID, Name, and ProductModel into the Report's Detail section. The report should look like the following figure.
- In this sample we'll use the Code 39 Barcode Symbology, but remember that you can use ANY Barcode Symbology built-in Barcode Professional.
Follow these steps:- Ensure to install Barcode Professional for Reporting Services.
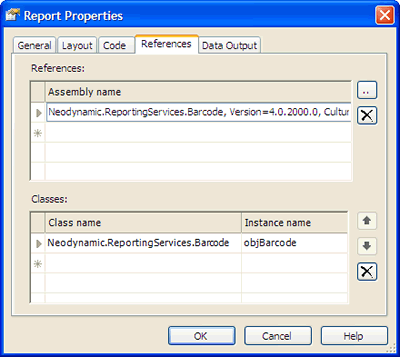
- In Visual Studio and with the report opened at design-time, add a reference to the Barcode Professional assembly (Neodynamic.ReportingServices.Barcode.dll) going to Report > Report properties... Add the reference as is shown in the following figure:
Notice that the assembly version could be different from the image depending on the Barcode Professional for Reporting Services version installed on your machine.
We'll need to create an instance of Barcode Professional to use it then in a custom function on the Report's Code section. To do this, add a new entry in the Classes grid as is shown in the following figure. Notice that the instance will be named objBarcode and that the full reference to the class is Neodynamic.ReportingServices.Barcode
- Finally, we need to create a VB.NET function which will be invoked to get the appropriate Code 39 barcode image by using the Barcode Professional instance created in the previous step. In the Code tab write the following code:
Public Function GetBarcode(ByVal code As String) As Byte()
  'Set the value to encode
  objBarcode.Code = code
  'Set the Code 39 Barcode Symbology
  objBarcode.Symbology = _
  Neodynamic.ReportingServices.Symbology.Code39
  'Set the Bar's height to 0.25 in
  objBarcode.BarHeight = 0.25F
  'Disable checksum
  objBarcode.AddChecksum = False
  'Enable AutoSize
  objBarcode.AutoSize = True
  'Generate the barcode image
  Return objBarcode.GetBarcodeImage()
End Function
This VB.NET function called GetBarcode requires a code parameter. This value will be specified with some fields of the DataSet in the Data Source report. And as you can see in this function you can set any property of Barcode Professional.
Click OK to close the dialog box.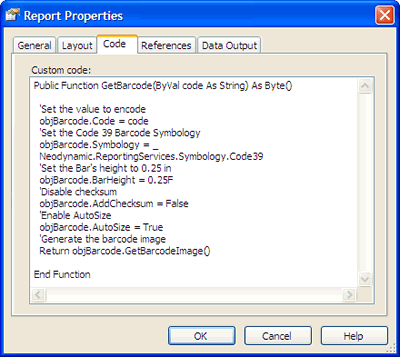
- Now we'll design the Product List report layout. In the Layout tab of the report drag & drop an Image control under Product ID column as is shown in the following figure:
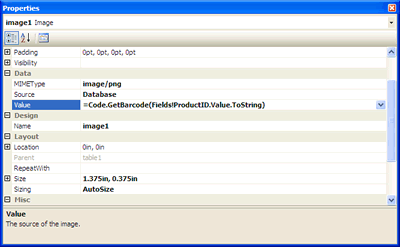
The image control will hold the barcode image. Please setting up its properties Source to Database, Sizing to AutoSize, MIMEType to image/png and Value to the following expression: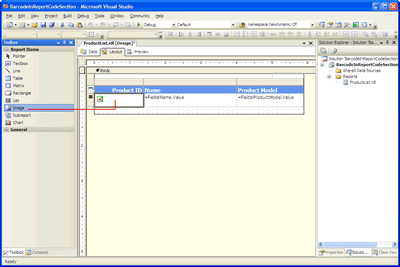
=Code.GetBarcode(Fields!ProductID.Value.ToString)
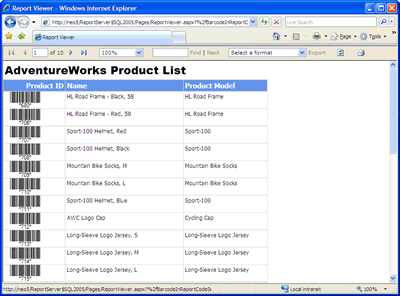
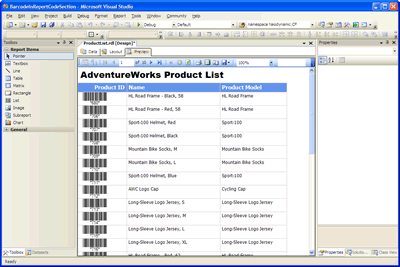
- Click on Preview tab and you'll get something like the following:
- Deployment
Please, refer to the product help documentation regarding this topic. - That's it. The Report Server is ready to deliver reports featuring barcode images.